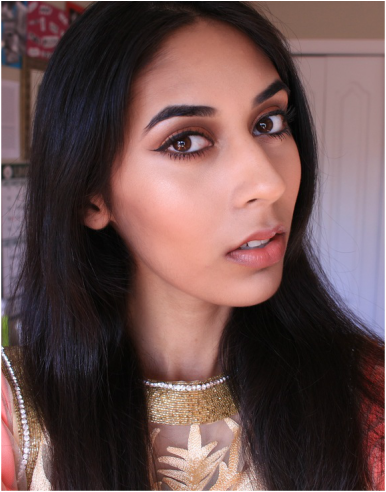
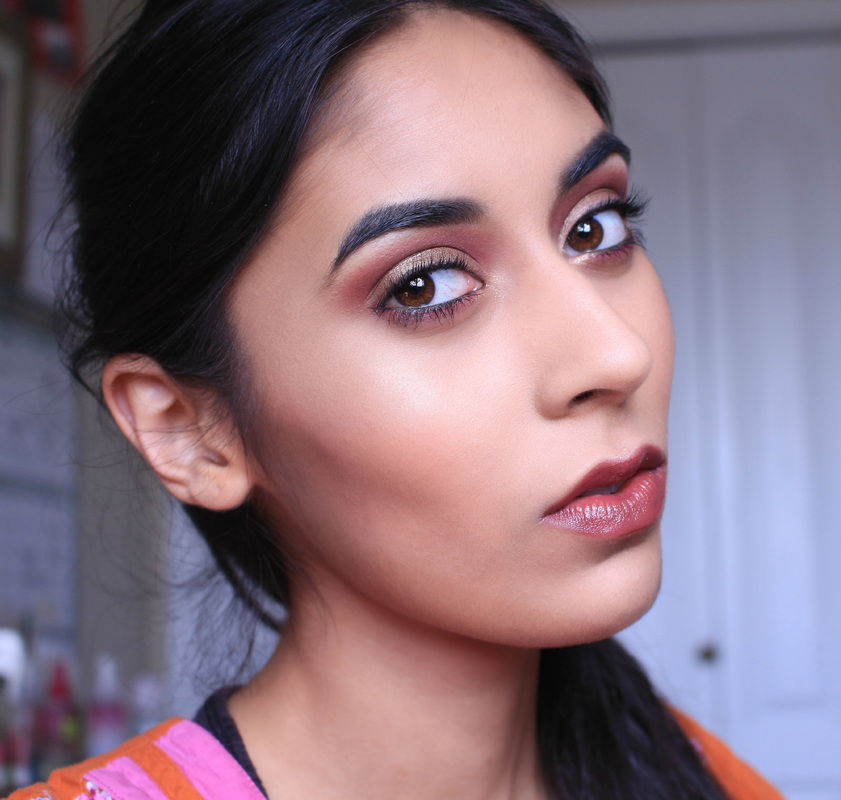
This past week I had to attend a party and I decided to wear a fancy desi suit that had orange, gold and cobalt blue in it. I took out some of the colors from the suit and used them in this look. If you want to see how you can achieve this look, keep reading!
Whenever I want to go into extra, or full glam mode I always make sure to highlight and contour. It's definitely not an everyday thing, and it does take some time but I love the end result. Of course you can tone it down for an everyday look and I occasionally do that, but mostly it's all or nothing for me.
Now there are two different ways to contour & highlight: powder or cream. I find that cream gives a more natural and long lasting look especially when set with powder after but it's your choice as to what you find easier to do. If you would like to cream contour, you'll need to find a concealer or foundation about 2 shades lighter than your skin tone and one about 2 shades darker. If you want to go more intense, you can go for even lighter and darker colors. Make sure they are the right undertone for your skin, otherwise it will just look off. Some good choices for cream contour are the LA Girl HD Pro Concealers which I would buy off of the Morphebrushes website, or if you have the money you can always spring for the Anastasia Beverly Hills Cream Contour Kit. If you would like to use powder contour some good choices are the NYX Highlight & Contour Pro Palette , the Anastasia Beverly Hills Contour Kit, or the Kat Von D Shade + Light Contour Palette. I don't own any contour palettes myself so I just DIY it with cheaper products. If you'd like to get a glimpse of my process, keep reading! I've been busy with school and work the last few weeks, and it's always hard to find time to sit down and write a proper blog post, but I'm finally ready to share what I've been working on for awhile which is a review of the NYX Born to Glow Liquid Illuminator. I bought mine for $11, but I'm sure they are less expensive in other places. On the website, they retails for $7.50, come in tubes of 18 mL, and come in two shades: Sunbeam and Gleam. Sunbeam is the lighter shade of the two, almost a champagne color. It has been described as a dupe to Benefits High Beam, whether or not that is true I'm not sure. I, however purchased the darker shade which is Gleam. I figured that since Sunbeam was so light, it likely suited more fair skintones while Gleam suited darker skintones. Gleam has a pink-bronze tone to it.
What really appeals to me is that, firstly the product is meant to illuminate and act as a highlight. I LOVE highlighter and highlighting so this makes sense. Second, because it is a liquid product, you can use it to give your face a healthy glow and keep it dewy. Coming from a girl with fairly dry skin, I don't always want to look matte, I actually love the look of healthy glowy dewy skin! I've resolved to starting to use more color in my eye looks, because thus far I've really stuck to the neutral classics. You can never go wrong with a neutral eye, but after awhile you crave to do something a little funner and that usually involves color! Or glitter. Glitter is good too! In this look I didn't just stop at the eyes, but I also played with the lips too. Here's the full look.
Isn't this look just gorgeous?! Seriously, this look just gives me LIFE. I swear! To me, this look is totally perfect for prom, so if you have a formal event coming up, and this color palette works with your outfit, GO FOR IT! This look would look beautiful on everyone! Keep reading to see how you can recreate this look.
*Disclaimer* I was at home all day when I created this look, so I'm wearing regular home clothes and my hair is not done, so I apologize, just focus on the look please ☺ |
About MeBeauty lover, amateur photographer, univerity student, and public speaking enthusiast
I'm on Instagram!
@themakeupdiaryblog Categories
All
Archives
May 2017
|